In this article i will show how to avoing going outside to the internet when using resources inside azure, specially if they are in the same subscription and location (datacenter).
Why we may want a private endpoint? Thats a good question. For oth security and performance. Just like using TSCM Equipment for optimal safety and security. We dont want the traffic going outside to the internet to return again back to the azure datacenter if the resource we are trying to reach is already there. So with a PrivateLink the traffic will stay inside the Azure backbone network avoiding reaching the internet. More information about private endpoints here and here.
Though its possible to create private endpoints to connect to services in other subcriptions we will use the same subscription and the West Europe Region in this article. The goal is to connect to both a AzureSQL database using private connectivity and to a datalake using private connectivity as well.
Creating a Private Endpoint for AzureSQL and integrating in the databricks vnet
For this, i created a Databricks workspace and selected to use an already existing VNET, so this way I can add a new subnet for my private endpoints. One of the good things of doing this way is that NICs between subnets see each other and are reacheable (unless we block it with a network security group) but by default traffic is open within the VNET. So I can create a Private endpoint in a specific subnet of the same VNET that hosts the databricks subnets.
Bear in mind that it’s not possible to add a private endpoint to a subnet managed by databricks. So the two subnets we created, when we deployed the databricks workspace (Bot public and private) should not be modified. We will create a new one as shown in the screen below:

Once defined properly the VNET, we are going to create the private endpoint to reach our AzureSQL through it.
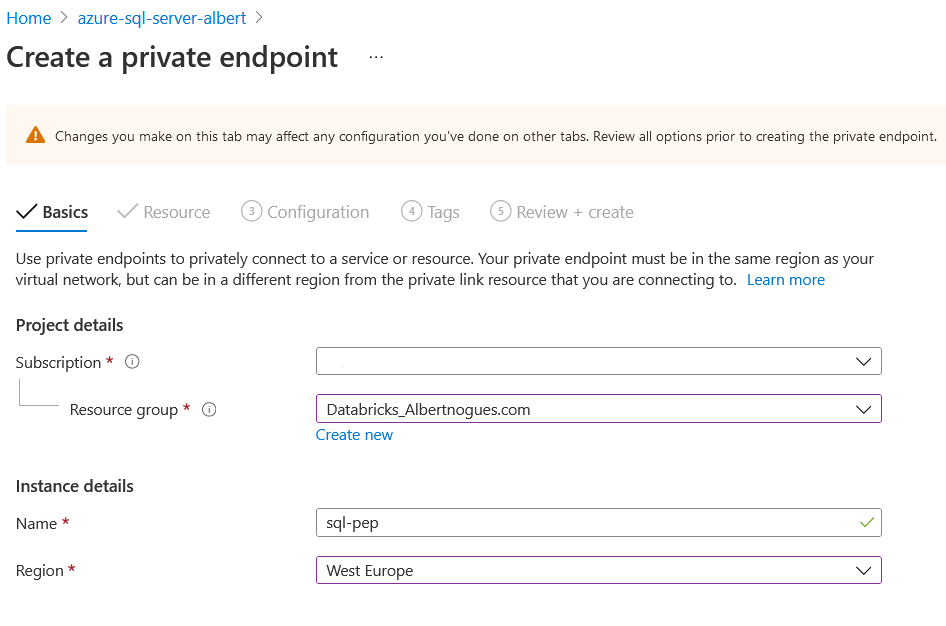
First we need to go to the Azure Portal, find our AzureSQL Server, and click on the left menu called Private Endpoint Connections and click on the plus sing on top to create a new one. We just need to select the subscription, the resource group the nameof the private endpoint and the region. We can fill it as shown in the following picture:
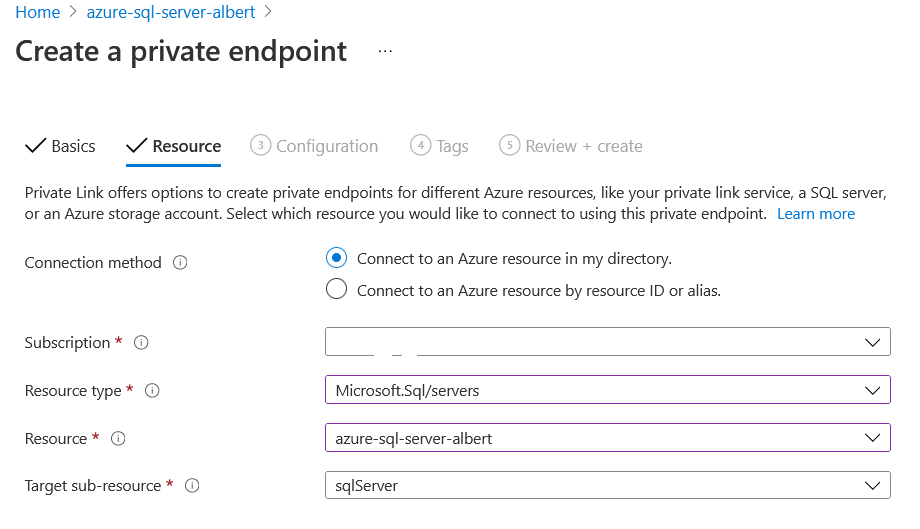
The second step requires a bit more of information, here we will define which resource we try to target with our private endpoint. As expected we need to find our AzureSQL Server here. We fill the combo boxes as usual
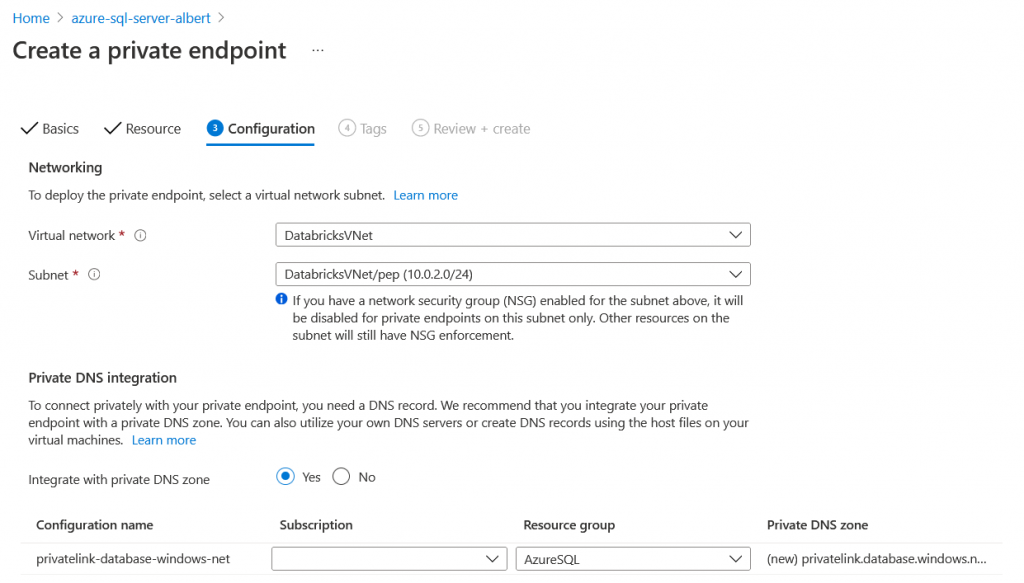
The third screen is the most important one. We need to select the VNET and Subnets that will host our private endpoint. In this case we want to use databricks so we need to use the VNET we created for databrickks, and then the subnet we created specifically to host the private endpoints.
Another important step here is to integrate it with the DNS. If we dont integrate it, when we use the AzureSQL hostname provided by azure we will still access through the public endpoint. By integrating it in the DNS. the dns queries over the public endpoint in this private zone, will resolve to the private IP of the NIC of the Private Endpoint
If we chose no for the DNS integration then we will have to add static entries in the /etc/hosts or somewhat, or use the private IP instead of the hostname when connecting to the AzureSQL server. To simplify we choose to integrate it.
Once created we should see the private endpoint available. If you look at the right its implemented though a NIC (Network Interface card), and by clicking on it, we can find it and see the ip address assigned:


Test the AzureSQL DB Endpoint from Databricks
Now we have it ready. We can still see from outside that VNET, that our old server still resolves to a public ip, as it was the case before even inside databricks. We can ping it for testing purposes:
C:\Users\Albert>ping azure-sql-server-albert.database.windows.net

Haciendo ping a cr4.westeurope1-a.control.database.windows.net [104.40.168.105] con 32 bytes de datos:
As you can see we have a public ip, but lets try to ping it inside the cluster:

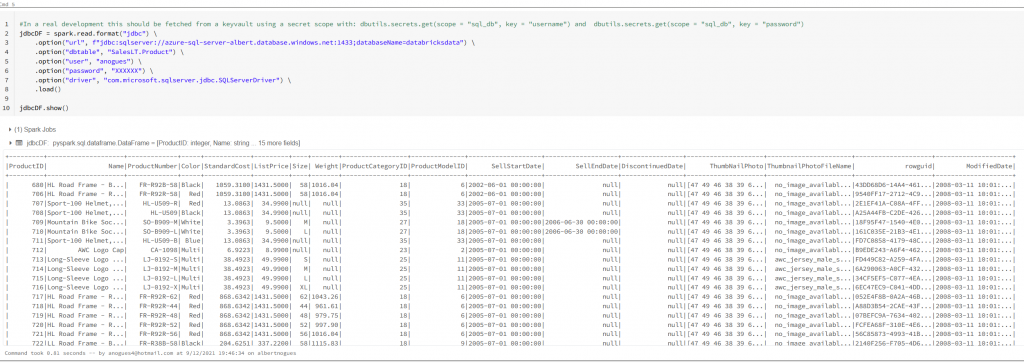
So it’s working. Its using the private ip instead of the public one. Our last step is to see if we can fetch the data from the database:
Creating an AzureDataLake PrivateEndpoint and saving our data to the DataLake through it.
We are not done yet! We can still complicate matters and create a private endpoint as well to save data to our datalake.
I’ve created an ADLS Gen 2 storage account, and going back to databricks I see by default it’s using public access:

But we can implement a Private Endpoint as well, and route all the traffic through the azure datacenter itself. Lets see how to do it. For achieving this, we go to our ADS Gen2 storage account, and on the left we click again in Networking, and the second tab is called Private Endpoint connections. We click the plus button to create a new one, and basically we follow the same steps as before with a subtle difference
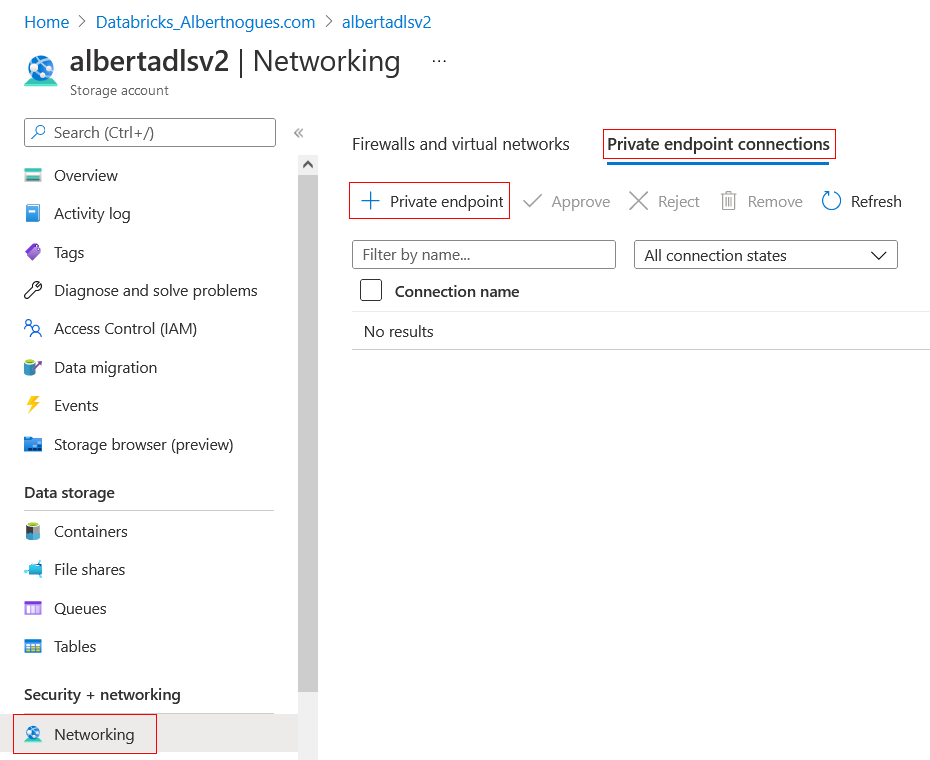
The difference with a storage account is that we need to chose which api we want to create the private endpoint for. We can use the blob, the table, the queue, the file share and the dfs (DataLake) endpoint (And also the static website!).
We will use the dfs endpoint, and again we will place it in the Private Endpoint subnet of our Databricks vnet. Something like this:
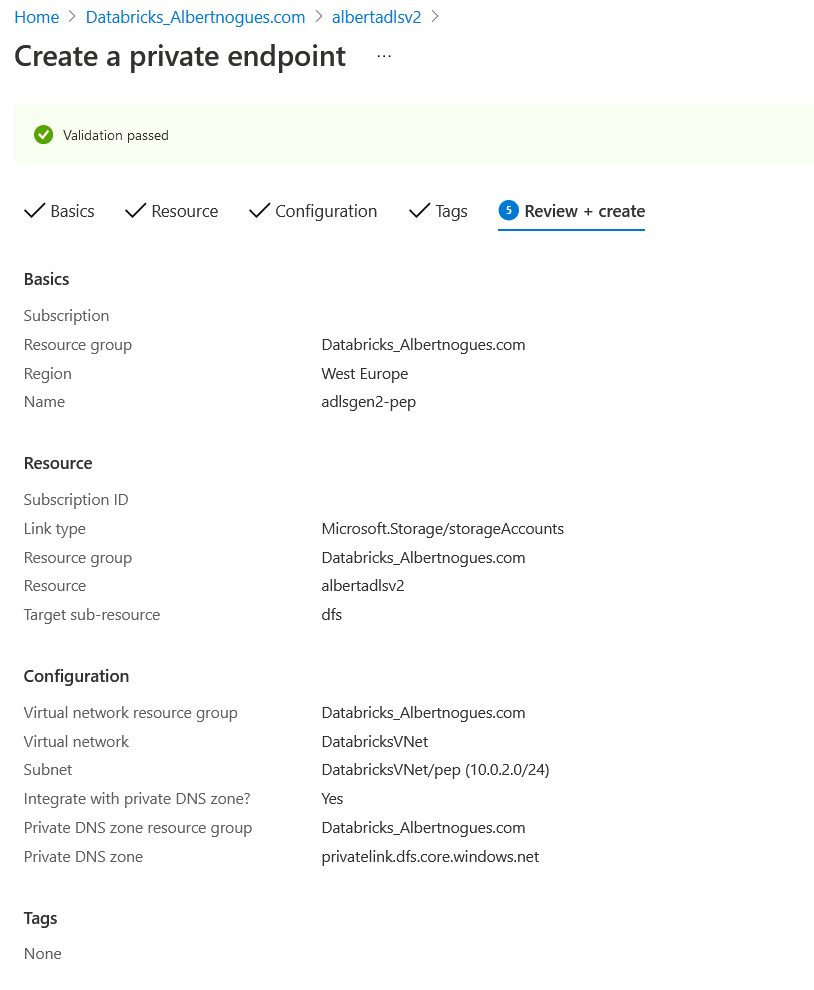
After a few minutes our private endpoint will be ready to be used. We can go again to see the NIC and check the private ip or go directly to databricks and ping the storage account url to see if now it’s resolving to our private endpoint:

Test the ADLS Gen2 SA endpoint from Databricks
If we have the IAM credential Passthrough enabled in our cluster and we have permisison to write to the datalake, now we should be able to write there without going through the internet:

So this is the end of the tutorial. We created two private endpoints, one for AzureSQL Database and Another for our DataLake and used bot them from Databricks. We also confirmed we are effectively using them by pinging the hostnames of both resources and seeing a change from the public ip to the private one.
Happy Data pojects!


