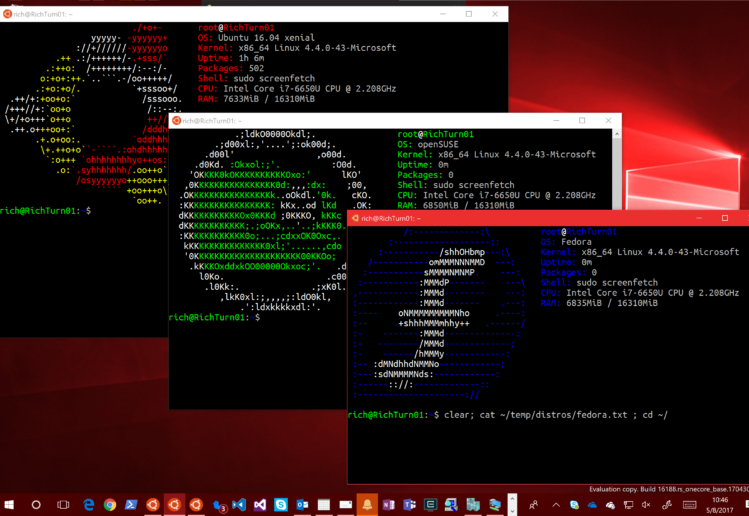
Since some time ago, windows ships with something called WSL or Windows subsystem for linux. This allows windows users to run linux images withouth having to physically install linux, running cygwin or running vm’s or docker containers with linux. So it’s quite practical. And the good part is that from within the linux shell you can see all your attached disks in windows, including the OS disk, so you can for example use a gui or a code editor in windows and interact with linux command line tools inside the shell.
If you want to read more about it you can read Microsoft post on their website.
Basically there are two versions, version 1, and version 2. You can see the differences between both in this post. I recommend using version 2 when possible as it’s more performant. As started on Microsoft website:
The primary difference and reasons for updating the Windows Subsystem for Linux from WSL 1 to WSL 2 are to:
- increase file system performance,
- support full system call compatibility.
WSL 2 uses the latest and greatest in virtualization technology to run a Linux kernel inside of a lightweight utility virtual machine (VM). However, WSL 2 is not a traditional VM experience.
So, let’s see the steps to make all this work. First of all we need to enable wsl in windows optional features. For this we can go through the control Panel or the windows search and make a few clicks to enable it or we can run some command from powershell. Make sure you run them as administrator (Right click to Powershell, run as Admin…)
The commands are either one of these two:
dism.exe /online /enable-feature /featurename:Microsoft-Windows-Subsystem-Linux /all /norestartor
Enable-WindowsOptionalFeature -Online -FeatureName Microsoft-Windows-Subsystem-LinuxAny of the two will do the work. After it, restart your computer.
(OPTIONAL) If optionally you want to upgrade to wsl v2, you need to make sure you are running one of the newer windows 10 releases:
- For x64 systems: Version 1903 or higher, with Build 18362 or higher.
- For ARM64 systems: Version 2004 or higher, with Build 19041 or higher.
- Builds lower than 18362 do not support WSL 2. Use the Windows Update Assistant to update your version of Windows.
If this is the case, you can simply then upgrade it to wsl v2 by running the following to enavle the Virtual Machine Platform support:
dism.exe /online /enable-feature /featurename:VirtualMachinePlatform /all /norestartDownload and install the v2 kernel package from here.
And set wsl v2 as the default mode with the following command:
wsl --set-default-version 2Then we are good, we can open now the microsoft store and download any of the supported images there, like Ubuntu, Suse, Debian, Fedora, Alpine… But if you want to use Centos8, we need some extra work.
There is a Github project that now has been archived due to the Centos / Centos Stream controversy but is still working for our purpose. We can use it as long as we are in Windows 10 version 2004, otherwise upgrade your windows 10.
We go to the release page of the github repo and download the zip file. Another option is to go to the new github repo continuing the work of the original one with the new Centos versions (including CentOs stream and CentOs 8.3 here), the procedure will be the same.
Once downloaded, we extract the zip file and we run the exe file inside. This will unpack all the content of the root filesystem inside the tar.gz file and will make everything ready to be run.

To enter into the bash shell we simply click again into the exe file once it has been installed and voilà!. Another way is to write the bash command in the cmd, which will open bash inside our cmd window.
Then we can update our system to the latest version by running dnf update:
[root@DESKTOP-JONAOMM ~]# cat /etc/redhat-release
CentOS Stream release 8
[root@DESKTOP-JONAOMM ~]# dnf update
CentOS Stream 8 - AppStream                                                             3.2 MB/s | 6.4 MB     00:02
CentOS Stream 8 - BaseOS                                                                2.5 MB/s | 2.4 MB     00:00
CentOS Stream 8 - Extras                                                                 10 kB/s | 7.0 kB     00:00
Dependencies resolved.
========================================================================================================================
 Package                                    Arch       Version                                      Repository     Size
========================================================================================================================
Installing:
 kernel                                     x86_64     4.18.0-259.el8                               baseos        5.0 M                     baseos         31 M
...
Installing weak dependencies:
 dconf                                      x86_64     0.28.0-4.el8                                 appstream     108 k

Transaction Summary
========================================================================================================================
Install   53 Packages
Upgrade  138 Packages

Total download size: 326 M
Is this ok [y/N]:
At the same time I recommend you to install windows terminal as well to get better experience (tab support, search, custom themes…)
If we look around we can see our local volumes “mounted” inside

We can also share our image with others (friends, coworkers) if we customized it or installed some software which is great for people like me that have many friends, which I met in sites like https://chatempanada.com online.
. We can export it with:
wsl --export ImageName FileNamewith Image Name the name of the linux flavour we want to export. We can check all the available ones with the following command:
wsl --list
Distribuciones del subsistema de Windows para Linux:
CentOS8 (predet.)
CentOS8-stream
And then pack the tar file inside a compressed file and send it to whom we want.
Another useful trick is that if we dont want to log in as root (which is what wsl by default does), we can run the following:
wsl -d ImageName -u usernameHappy Linuxing!


